If you are a person like me who can’t get enough REM sleep due to noisy outdoors, I bet you must have made several efforts to soundproof your room.
Like me, you might have soundproofed the doors and insulated the windows, and even purchased the best soundproofing curtains available in the town, but are still tired of the irritating sound that can travel from your above-door air vents.
Well, not anymore!
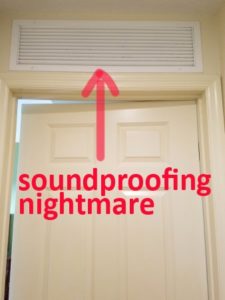
Even after covering all the doors & windows, sound can get through the air vents above your entries, which you missed earlier. And the whole effort of soundproofing a bedroom goes to waste if you don’t pay special attention to these noisy air vents.
You can always cover the air vent with a soundproof vent covers, blocking out the noise but restricting the airflow in the room and disturbing the overall ventilation.
However, in the long term, this can not only result in health complications but also lead to unwanted odor, mold growth & cooling problems inside a room.
Page Contents
So, the question arises, can you sound-proof an air vent without messing up with the air flow?
Luckily, there are a few things that can be done to stop noise traveling through vents above the doors without completely blocking the airflow. Whether you are a budding YouTuber or a musician or a corporate, your sound-proofing needs & objectives will be different.
Based on your sound-proofing need and level of air flow needed in a room, a choice can be made from several alternatives.
Inspecting the Air Vent
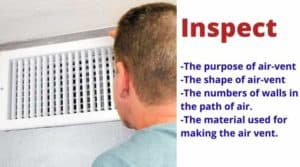
But before you go on to soundproofing your air vent, there is one major step that most people ignore, i.e., examining the air vent. For choosing the right vent noise reduction technique, it is essential to understand:
- The purpose of the air vent.
- The shape of the air-duct.
- The numbers of walls/surfaces in the path of air.
- The material used for making the air vent.
All air vents can be broadly classified into two types – Ventilation vents and HVAC Vents.
Ventilation vents are made for cross-ventilation between two rooms and are usually located above the doors, whereas the HVAC vents are responsible for temperature control within an infrastructure. There might be condensation in these door vents if they are blocked without proper insulation.
 The shape of the air vent & its length determines the pathway that air, and sound, have to travel. Straight & short vents are always nosier than longer vents.
If there are enough barriers/walls in the path of the sound, the flow of air will be restricted. The sound waves will bounce off the surfaces, losing more energy, thus resulting in noise reduction.
Materials like aluminum & steel lead to louder echoes, creating more noise in the bedroom. Leakages & gaps in the air duct network can further lead to loud, hissing noise in the system, which needs to be catered to individually.
It is essential to identify and understand the problems in the ductwork to choose an efficient soundproofing method from the available alternatives.
Best Tips For Soundproofing Your Air Vents
I have faced the same soundproofing problem as you are facing today. So I tried and tested a few things in my home. I am gonna share what all worked for me in soundproofing my air ducts/vents.
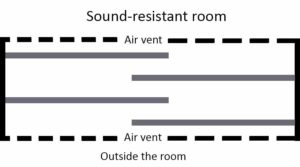
1. Create A Sound Maze Within The Air vent
Does your house get very hot and a little uncomfortable during summers without ventilation? If yes, blocking the overhead door vent is not an option. The best possible alternative, in this case, is creating a sound maze.
With the help of Sound Mazes, the air will continue to flow freely through the air vent, meanwhile using up the energy of sound waves & deadening the effect of noise. With several barriers in the path of the sound, the air is forced to move in a zig-zag pattern within the air vent.
As the sound bounces off from several surfaces covered with sound-absorbers, this method is quite effective in reducing the noise without much restricting the flow of air. The air will still be able to get through, but there will be significant air vent noise reduction.
How To Build An Air Vent Sound Maze: An Easy Guide
Making a sound-maze might seem like a huge, tiresome task at first, but with the right materials and instructions, it is just as easy as any other DIY project.
Well prepared is almost half-way there! These are easy-to-find materials you can easily purchase from your local hardware store. Once you have gathered up all the tools & equipment, choose an efficient workplace to avoid any accidental damages while using the wood saw or the glue. Open the air vent with the help of a step ladder and screwdriver. Measure the dimensions of the air vent with a measuring tape. The total length of the vent will determine the number of barriers needed in the maze. Transfer the measurements (Width x Height) of the duct to the plywood sheet. Cut out the first piece and check if it fits in the air vent. The piece should we as tall as the air vent but at least 30% narrower than the whole vent so that the air can pass. Cut four such pieces. If the air vent runs longer, make more walls for effective results. Cover both sides of the plywood pieces with acoustic foam. The abortive material of the acoustic foam will prevent the sound from echoing off the walls and use up the sound energy, reducing the intensity noise, which is escaping the air vents. After covering the plywood with the acoustic foam, arrange them inside the air went and position them on alternative sides to form a maze. Fix these pieces with the help of adhesive on alternate sides one by one. For sufficient air circulation, do leave at least 1 inch of space between each plywood wall. Once you’ve fixed the maze walls, cover the sides and top and bottom of your air vent with acoustic foam – an efficient sound absorber. Firmly attach it with the help of the glue. This step will further help in reducing the overall echo within the air vent. Finally, screw the covers back again on the air vent. The acoustic form is essentially a sound-absorbing material usually used in studios, cinemas, and theatres. Usually, this foam has polyurethane-based materials, such as polyether, polyester, and extruded melamine.
Here’s a step-by-step procedure on how to create a simple & effective sound-maze:
Step 1: Measure the Air Vent Size
Step 2: Cut the Plywood in the same size
Step 3: Glue the Acoustic Foam over the Plywood
Step 4: Fix the Plywood inside the Air Vent
Step 5: Cover the interior of the air vent with the Acoustic Foam
2. Use Acoustic Foam to reduce noise
You can quickly get different varieties of acoustic foam at your local hardware store or purchase it online for less than $1.5/ square foot. If you have any left-overs from sound-proofing your room earlier, they might turn out to be useful now.
The drill is elementary. Open the air vent with a screwdriver and cover the complete interiors of the air vent with a layer of acoustic form. Firmly fixing it to the sides with the help of an adhesive. Now Reattach the cover, and the form will help in trapping & reducing the energy of sound waves, thus deadening the noise on the way.
3. Cover The Vent with Soundproof Curtain Covers
Sometimes, air vents are just necessary to maintain the room temperature in the peak summers and allow ventilation within a closed room. Blocking the air vent permanently may have more consequences than benefits. In such cases, the right solution might be to cover it temporarily with a simple cover – something like a soundproofing curtain or blanket.
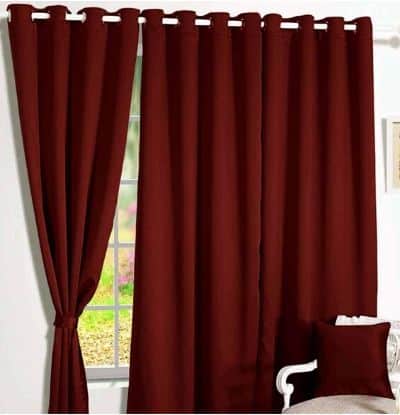 This is by far the most straightforward & affordable technique to reduce noise coming in from the air vents without compromising with the overall aesthetics of the room.
All you need to do is install a curtain rail above the vent and hang a thick curtain over it. The curtain doesn’t necessarily have to be sound -resistant. A cover made up of thick and dense material with several layers can be just as efficient in deadening the sound vibrations.
You can easily find sound-proofing curtains at local interior décor stores or purchase them online.
If you are covering an air vent just above the door, add the curtain rail just above the air vent and drop the curtain to the floor for the best results. During hot days of summer, all you need to do is open up the curtains and let the airflow.
4. Block the air vent with a Dry Wall
So far, we have discussed the ways to make return air sound baffle without completely losing its functionality. However, if you are looking for complete vent noise silencer, for example, in a music studio, you can start by removing or blocking the air vent entirely.
If heat isn’t a significant issue in the apartment and you have enough ventilation, this measure can be handy, especially for the non-HVAC vents. The process of air duct noise silencer is relatively simple:
Step 1: Open Air Vent
Open the air vent and fix a wooden plank equal to the dimensions of the air vent at the very beginning of the vent.
Step 2: Insulate Ducting
You can choose to fill the duct with some insulation like drywall or gypsum, or you can choose to close off the vent with another wooden plank and seal it off with drywall.
Step 3: Blend Wall With Gap Filler
Once you are done with the filling the vent, blend it with the wall with some wall-based adhesive. After it dries, mix it with the wall texture with the help of sandpaper and paint it to match the wall.
5. Fill the Air Vent with a Sound-Proofing Sealant
Another easier & less tiresome option is to soundproof an air vent is to use an acoustic sealant to fill the gap. You can use some foam sealant or gap fillers, which expands to fill the surface wherever it is applied. For example, you can check out- Great Stuff Gap Filler or Touch n’ Foam Max Filler.
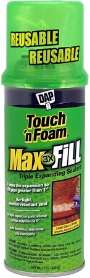 Giving essentially the same results as drywall filler, these sealants are airtight and water-resistant once they’re set. Additionally, it can also even out the wall texture with a sand-paper and paint it to match the rest of the wall.
Since the sealant is water-resistant, it can easily take up the condensation, which is usually caused by a working HVAC system.
The process is unimaginably easy; all you have to do is put on your work gloves, remove the duct cover, spray the foam over the air duct and fill it, and put it on the cover back on. The whole process takes about a few minutes!
6. Plug the Air-Vent Temporarily
If the air vent is letting in a lot of noise and it is just unbearable, but there is a considerable ventilation problem as well, you can create a simple, temporary plug that can easily be installed and removed as and when needed. To create a temporary cap, the steps are:
Step 2: Transfer these dimensions on quarter-inch thick plywood. Cut out the piece with a simple wood saw. Step 3: Put this wood cut-out on the inside of the air went and tape it with a water-proof tape. Step 4: In the end, you can also apply some weather-stripping tape along the inside edges of the vent cover to make sure that no noise will get past it. The result will be just as same as blocking the air-vent. However, it can be easily removed whenever required. This handy solution will leave you with a still-functional air vent. Using the available duct lines, i.e., absorptive materials inside the HVAC systems, can not only help in reducing the noise but also help in reducing the electricity bills by insulating the entire ventilation system. There are several soundproof ducting readily available online – one of them being Reflectlix- which is quite cheap. Flexible ducts can be bent in required shapes, creating barriers for the air and sound waves, thus reducing noise. P.S. Bends in flexible ducts may have some small breaks in them which may expose your vents directly to sound. For precautions use only good quality flex ducts like Dundas Jafine. If the vents are directly exposed to sound, then insulating soffits can be used to cover. In this case, a typical one with a layer of MDF board with some insulating material. The flexible duct inside the soffit will have a lot of bends so that we can achieve a better sound reduction. If the sound you wish to block isn’t deafening, rather a constant irritating voice, these small techniques will surely do the trick for you. Sometimes, the reason for unnecessary noise can be ineffective & old HVAC systems. There might be leakages & gaps in the ductwork itself, creating unwanted hissing and bussing noise. If you have enough budget in hand, the best option would be to consult a professional and renovate the complete ventilation system, ensuring voice reduction with an adequate flow of air within the house. While it may seem like a big investment, it can be beneficial in the long run. Everyone has different sound dampening needs, and so the best sound-proofing option will differ with every project. No matter how much you invest in the process of soundproofing your bedroom, it’ll all be for nothing if you don’t pay special attention to the air-vents. This irritating noise problem can be solved with the easy solutions stated above. All you need to do is to choose the best alternative based on your sound-proofing need, the requirements of the room, the budget allocated, and the efforts involved. If a vent is not in use, it is advised to cover it entirely. You are just a small step away from the peaceful, silent room of your dreams! With these DIY projects, you can quickly complete your soundproofing without huge investments and any professional help. So, what are you waiting for? Get started now!Soundproofing HVAC Vents
1. Use Duct-liners, Flexible Ducts & Soffits
Duct Liners
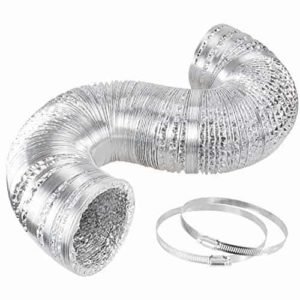 Flexible Ducts
Soffits
2. Upgrade your HVAC System
So, How To Stop Noise From Traveling Through Vents